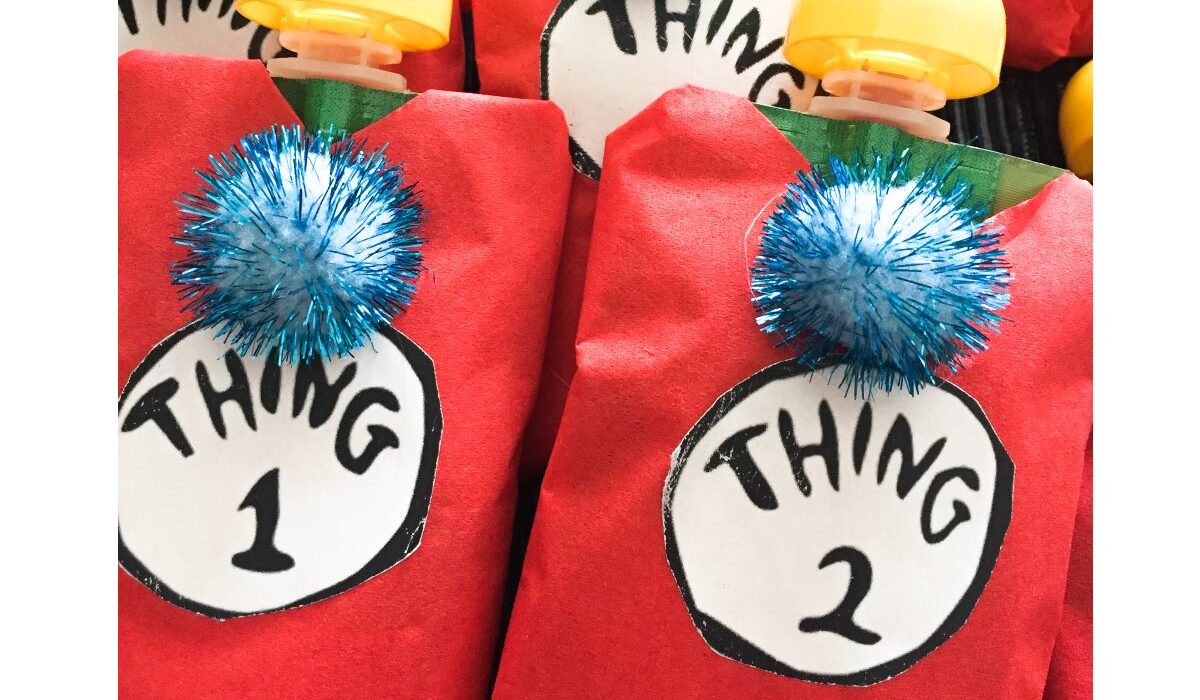
Dr. Seuss Day is March 2nd. Need an allergy friendly snack idea to celebrate in your child’s classroom? I’m happy to share the idea I came up with last year!
The last week of February 2019 I had very little extra time since our dog had just suffered a stroke. Bobby and I were running on fumes from being up with her for days. I was asked by my son’s teacher to provide a safe snack for the class for Dr. Seuss Day. It was one of those times where I really wanted to say no, but couldn’t; Ryan’s school had always been so accommodating for his allergies. The preschool typically had two choices at snack time and immediately I knew I was going to plan on fish crackers, but needed a second option for the kids. After drop off, I hopped in the car, and while sitting in the parking lot, scrolled through Pinterest and wasn’t really wowed by anything. After about 5 minutes, something came to me; I had a plan in my head and needed to execute it- Thing 1/Thing 2 Applesauce pouches. Even with the little amount of energy I had, I was really excited for this idea.
When I first came up with the covered pouches, I envisioned blue yarn pom poms on the yellow caps. After thinking about it for all but 30 seconds, I quickly decided that those would take too long to make. I ran into our local grocery store grabbed the fish crackers, and applesauce pouches. Then I headed over to the craft section and came across some blue sparkly 1 inch pom poms. They were assorted in color. Looking at the package, I was able to count 12 blue ones which is exactly the number I needed for the preschool. At home I already had large shipping labels, and some left over red napkins from a previous party. I picked my son up from school, and home we went to try and figure out how to pull this together. Once I figured out how to wrap the pouches in the napkins, things went very quickly- my 3 year old was even able to help me. We brought them to school on Dr.Seuss Day, and they were a huge hit! The preschool staff and kids all raved about how cute they were. I may even offer to do it again for both my kids’ schools this year! If you’re looking to recreate this snack, I have included step by step instructions on how I made these below:
Supplies needed:
- Pack of red luncheon size napkins (I used 6 napkins for 12 pouches)
- Large printing labels (2 labels per 8 1/2″x 11″)
- If you don’t have printing labels, you can use plain white paper and glue to attach them.
- Computer and printer
- Scissors
- Marker or pen
- Light Blue 1″ Pom Poms (one for each pouch)
- Hot glue gun with glue sticks
- Clear tape
Step 1: Print out your Thing 1 & Thing 2 labels. Decide how large you want your stickers to be (mine were 1.5″). I printed all 12 of my labels off on one self adheisive sheet. I used this link to get the logos. You can also draw them individually if you want. (If you don’t have large adhesive labels, you can always cut out regular paper and glue them on the pouches with a glue stick or a couple dots of hot glue)

Step 2: Place one of the napkins in front of you so that the natural fold is on the right. The left and bottom should be loose with no folds. Once you have your napkin set up correctly, fold the napkin in half vertically as seen with the dotted white line above.

Step 3: Now that the napkin is folded in half, use a marker or pen to mark a small semi circle in the upper right corner. Cut along your dotted line.

Step 4: Open your Napkin up so that it looks like the above picture. The top should still have a fold in it between the areas that you cut out. Use your scissors again to cut the napkin in half, along the black dotted line I created.

Step 5: Open up one half of the naplkin and place the applesauce so that the cap is through the semicircle hole you created at the top. Fold the bottom napkin up and tape it to the pouch.

Step 6: Flip the whole thing over and now it’s just like wrapping a present.

Step 7: Create a point with the napkin at the bottom, and then fold it up and tape it.

Step 8: Flip the pouch over so the tape is all on the backside. Using one of the labels you have cut out, put it onto the center of the pouch.

Step 9: Using the hot glue gun, attach a pom pom just above the circle “Thing” label and allow them to cool.

I hope you find these as easy and fun to make as I did!

clipart-library.com, http://clipart-library.com/clipart/378843.htm,
Thing 1 and Thing 2 images


